대용량 데이터를 효율적으로 처리하는 Spring Batch를 시작해보겠습니다.
Sample Code
이 시리즈에서 다루는 전체 예제 코드는 GitHub에서 확인할 수 있습니다.
spring-batch-sample
시리즈 목차
이 글에서 다룰 내용
- Spring Batch가 무엇이고 왜 필요한가?
- 핵심 개념 이해하기 (Job, Step, Chunk)
- Gradle 프로젝트 설정
- Hello World 배치 만들기
Spring Batch가 필요한 순간
이런 상황을 겪어보셨나요?
1
2
3
4
5
6
| // 100만 건의 데이터를 처리하려고 했더니...
List<User> users = userRepository.findAll(); // OutOfMemoryError!
for (User user : users) {
processUser(user);
}
|
위 코드의 문제점은 명확합니다.
- 메모리 부족 (모든 데이터를 한 번에 로딩)
- 느린 처리 속도 (단건 처리)
- 재시작 불가 (중간에 실패하면 처음부터)
- 모니터링 어려움 (진행률 확인 불가)
Spring Batch가 해결해줍니다
| 문제 | Spring Batch 해결책 |
|---|
| 메모리 부족 | Chunk 단위 처리로 메모리 효율적 |
| 느린 처리 속도 | Batch Update로 빠른 처리 |
| 재시작 불가 | 실패 지점부터 재개 지원 |
| 모니터링 어려움 | 메타데이터 자동 관리로 진행률 추적 |
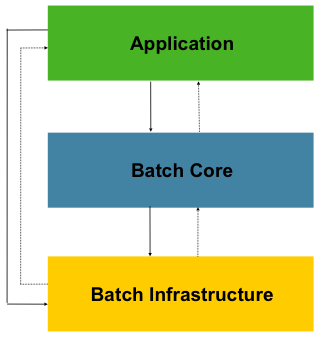
Spring Batch 핵심 개념
전체 구조 한눈에 보기
flowchart TB
    subgraph Job["Job (배치 작업 전체)"]
        subgraph Step1["Step 1"]
            Reader1["Reader"] --> Processor1["Processor"] --> Writer1["Writer"]
            Chunk1["Chunk: 1000건씩 처리"]
        end
        subgraph Step2["Step 2"]
            Reader2["Reader"] --> Processor2["Processor"] --> Writer2["Writer"]
        end
        Step1 --> Step2
    end
1. Job: 배치 작업의 최상위 개념
Job은 배치 작업 전체를 의미합니다.
1
2
3
4
5
6
| @Bean
public Job emailSendJob(Step emailSendStep) {
return jobBuilderFactory.get("emailSendJob")
.start(emailSendStep)
.build();
}
|
쉽게 말해 회사의 “프로젝트” 같은 개념이라고 보시면 됩니다. 여러 Step(단계)으로 구성됩니다.
2. Step: 실제 작업이 수행되는 단계
Step은 Job을 구성하는 독립적인 작업 단위입니다.
1
2
3
4
5
6
7
8
9
| @Bean
public Step emailSendStep() {
return stepBuilderFactory.get("emailSendStep")
.<Email, Email>chunk(1000) // 1000건씩 처리
.reader(emailReader())
.processor(emailProcessor())
.writer(emailWriter())
.build();
}
|
프로젝트의 “태스크” 같은 개념입니다. Reader → Processor → Writer로 구성됩니다.
3. Chunk: 데이터를 묶어서 처리하는 단위
Chunk는 한 번에 처리할 데이터의 개수입니다.
flowchart LR
    subgraph Chunk1["Chunk 1 (1000건)"]
        R1["Read 1000건"] --> P1["Process 1000건"] --> W1["Write 1000건"]
        C1["COMMIT"]
    end
    subgraph Chunk2["Chunk 2 (1000건)"]
        R2["Read 1000건"] --> P2["Process 1000건"] --> W2["Write 1000건"]
        C2["COMMIT"]
    end
    Chunk1 --> Chunk2
핵심 포인트를 정리하면 다음과 같습니다.
- Chunk 단위로 읽고, 처리하고, 쓰기
- Chunk 단위로 트랜잭션 커밋
- 실패 시 해당 Chunk만 롤백
4. Reader, Processor, Writer
Reader: 데이터 읽기
1
2
3
4
5
6
7
8
9
| @Bean
public ItemReader<Email> emailReader() {
return new JpaPagingItemReaderBuilder<Email>()
.name("emailReader")
.entityManagerFactory(entityManagerFactory)
.queryString("SELECT e FROM Email e WHERE e.status = 'PENDING'")
.pageSize(1000)
.build();
}
|
데이터베이스, 파일, API 등에서 데이터를 읽어오는 역할을 합니다.
Processor: 데이터 가공
1
2
3
4
5
6
7
8
9
10
11
12
13
14
15
16
17
| @Bean
public ItemProcessor<Email, Email> emailProcessor() {
return email -> {
// 이메일 발송 로직
boolean success = emailService.send(
email.getToEmail(),
email.getSubject(),
email.getContent()
);
// 상태 업데이트
email.setStatus(success ? "SUCCESS" : "FAILED");
email.setSentAt(LocalDateTime.now());
return email;
};
}
|
데이터 검증, 비즈니스 로직 수행, 데이터 변환 등을 담당합니다.
null을 반환하면 해당 아이템은 skip됩니다!
Writer: 데이터 저장
1
2
3
4
5
6
| @Bean
public ItemWriter<Email> emailWriter() {
return new JpaItemWriterBuilder<Email>()
.entityManagerFactory(entityManagerFactory)
.build();
}
|
처리된 데이터를 데이터베이스, 파일 등에 저장합니다.
프로젝트 설정
1. Gradle 설정 (build.gradle)
1
2
3
4
5
6
7
8
9
10
11
12
13
14
15
16
17
18
19
20
21
22
23
24
25
26
27
28
29
30
31
32
33
34
35
36
37
38
39
40
41
42
43
| plugins {
id 'java'
id 'org.springframework.boot' version '3.2.2'
id 'io.spring.dependency-management' version '1.1.4'
}
group = 'com.example'
version = '0.0.1-SNAPSHOT'
java {
sourceCompatibility = '21'
}
configurations {
compileOnly {
extendsFrom annotationProcessor
}
}
repositories {
mavenCentral()
}
dependencies {
// Spring Boot Starters
implementation 'org.springframework.boot:spring-boot-starter-batch'
implementation 'org.springframework.boot:spring-boot-starter-data-jpa'
// Database
runtimeOnly 'org.postgresql:postgresql'
// Lombok
compileOnly 'org.projectlombok:lombok'
annotationProcessor 'org.projectlombok:lombok'
// Test
testImplementation 'org.springframework.boot:spring-boot-starter-test'
testImplementation 'org.springframework.batch:spring-batch-test'
}
tasks.named('test') {
useJUnitPlatform()
}
|
핵심 의존성 설명
| 의존성 | 역할 |
|---|
spring-boot-starter-batch | Spring Batch 핵심 기능 |
spring-boot-starter-data-jpa | JPA를 통한 DB 접근 |
postgresql | PostgreSQL 드라이버 |
spring-batch-test | 배치 테스트 지원 |
2. application.yml 설정
1
2
3
4
5
6
7
8
9
10
11
12
13
14
15
16
17
18
19
20
21
22
23
24
25
26
27
28
29
30
31
32
33
34
35
36
37
38
39
40
41
42
43
| spring:
application:
name: email-batch-service
# DataSource 설정
datasource:
url: jdbc:postgresql://localhost:5432/batch_db
username: postgres
password: postgres
driver-class-name: org.postgresql.Driver
# HikariCP 커넥션 풀 설정
hikari:
maximum-pool-size: 10
minimum-idle: 5
connection-timeout: 30000
idle-timeout: 600000
max-lifetime: 1800000
# JPA 설정
jpa:
database-platform: org.hibernate.dialect.PostgreSQLDialect
hibernate:
ddl-auto: update
show-sql: true
properties:
hibernate:
format_sql: true
highlight_sql: true
# Spring Batch 설정
batch:
jdbc:
initialize-schema: always # 배치 메타데이터 테이블 자동 생성
job:
enabled: false # 자동 실행 방지 (수동으로 실행)
# 로깅 설정
logging:
level:
org.springframework.batch: INFO
org.hibernate.SQL: DEBUG
com.example: DEBUG
|
설정 포인트
initialize-schema: always
1
2
3
4
| spring:
batch:
jdbc:
initialize-schema: always
|
Spring Batch 메타데이터 테이블을 자동 생성합니다.
BATCH_JOB_INSTANCEBATCH_JOB_EXECUTIONBATCH_STEP_EXECUTIONBATCH_JOB_EXECUTION_CONTEXTBATCH_STEP_EXECUTION_CONTEXT
| 옵션 | 설명 |
|---|
always | 항상 생성 (개발 환경) |
never | 생성 안 함 (운영 환경 - 수동 생성) |
job.enabled: false
1
2
3
4
| spring:
batch:
job:
enabled: false
|
애플리케이션 시작 시 배치 자동 실행을 방지합니다. 배치는 스케줄러나 수동으로 실행하는 것이 일반적입니다.
3. 데이터베이스 테이블 생성
1
2
3
4
5
6
7
8
9
10
11
12
13
14
15
16
17
18
19
20
21
22
23
24
25
| -- 이메일 발송 큐 테이블
CREATE TABLE email_send_queue (
id BIGSERIAL PRIMARY KEY,
to_email VARCHAR(255) NOT NULL,
subject VARCHAR(500) NOT NULL,
content TEXT NOT NULL,
status VARCHAR(20) NOT NULL DEFAULT 'PENDING',
sent_at TIMESTAMP,
error_message TEXT,
retry_count INT DEFAULT 0,
created_at TIMESTAMP DEFAULT CURRENT_TIMESTAMP,
updated_at TIMESTAMP DEFAULT CURRENT_TIMESTAMP
);
-- 인덱스 생성 (성능 최적화)
CREATE INDEX idx_email_status ON email_send_queue(status);
CREATE INDEX idx_email_created_at ON email_send_queue(created_at);
-- 샘플 데이터 입력
INSERT INTO email_send_queue (to_email, subject, content) VALUES
('user1@example.com', 'Welcome!', 'Welcome to our service'),
('user2@example.com', 'Newsletter', 'Check out our latest news'),
('user3@example.com', 'Promotion', 'Special discount for you'),
('invalid@test.com', 'Test', 'This will fail'),
('user5@example.com', 'Update', 'System update notification');
|
Hello World 배치 만들기
간단한 로그 출력 배치를 만들어보겠습니다.
1단계: Entity 생성
1
2
3
4
5
6
7
8
9
10
11
12
13
14
15
16
17
18
19
20
21
22
23
24
25
26
27
28
29
30
31
32
33
34
35
36
37
38
39
40
41
42
43
44
45
46
| package com.example.batch.entity;
import jakarta.persistence.*;
import lombok.Getter;
import lombok.NoArgsConstructor;
import lombok.Setter;
import java.time.LocalDateTime;
@Entity
@Table(name = "email_send_queue")
@Getter
@Setter
@NoArgsConstructor
public class Email {
@Id
@GeneratedValue(strategy = GenerationType.IDENTITY)
private Long id;
@Column(name = "to_email", nullable = false)
private String toEmail;
@Column(nullable = false)
private String subject;
@Column(nullable = false, columnDefinition = "TEXT")
private String content;
@Column(nullable = false, length = 20)
private String status = "PENDING";
@Column(name = "sent_at")
private LocalDateTime sentAt;
@Column(name = "error_message", columnDefinition = "TEXT")
private String errorMessage;
@Column(name = "retry_count")
private Integer retryCount = 0;
@Column(name = "created_at")
private LocalDateTime createdAt = LocalDateTime.now();
@Column(name = "updated_at")
private LocalDateTime updatedAt = LocalDateTime.now();
}
|
2단계: 간단한 배치 Configuration
1
2
3
4
5
6
7
8
9
10
11
12
13
14
15
16
17
18
19
20
21
22
23
24
25
26
27
28
29
30
31
32
33
34
35
36
37
38
39
40
41
42
43
44
45
46
47
48
49
50
51
52
53
54
55
56
57
58
59
60
61
62
63
64
65
66
67
68
69
70
71
72
73
74
75
76
77
78
79
80
81
82
83
84
85
86
87
88
89
| package com.example.batch.job;
import com.example.batch.entity.Email;
import lombok.RequiredArgsConstructor;
import lombok.extern.slf4j.Slf4j;
import org.springframework.batch.core.Job;
import org.springframework.batch.core.Step;
import org.springframework.batch.core.job.builder.JobBuilder;
import org.springframework.batch.core.repository.JobRepository;
import org.springframework.batch.core.step.builder.StepBuilder;
import org.springframework.batch.item.ItemProcessor;
import org.springframework.batch.item.ItemReader;
import org.springframework.batch.item.ItemWriter;
import org.springframework.batch.item.database.builder.JpaPagingItemReaderBuilder;
import org.springframework.context.annotation.Bean;
import org.springframework.context.annotation.Configuration;
import org.springframework.transaction.PlatformTransactionManager;
import jakarta.persistence.EntityManagerFactory;
@Slf4j
@Configuration
@RequiredArgsConstructor
public class HelloBatchConfiguration {
private final JobRepository jobRepository;
private final PlatformTransactionManager transactionManager;
private final EntityManagerFactory entityManagerFactory;
/**
* Job 정의
*/
@Bean
public Job helloJob() {
return new JobBuilder("helloJob", jobRepository)
.start(helloStep())
.build();
}
/**
* Step 정의
*/
@Bean
public Step helloStep() {
return new StepBuilder("helloStep", jobRepository)
.<Email, Email>chunk(10, transactionManager) // 10건씩 처리
.reader(helloReader())
.processor(helloProcessor())
.writer(helloWriter())
.build();
}
/**
* Reader: PENDING 상태의 이메일 조회
*/
@Bean
public ItemReader<Email> helloReader() {
return new JpaPagingItemReaderBuilder<Email>()
.name("helloReader")
.entityManagerFactory(entityManagerFactory)
.queryString("SELECT e FROM Email e WHERE e.status = 'PENDING' ORDER BY e.id")
.pageSize(10)
.build();
}
/**
* Processor: 로그만 출력
*/
@Bean
public ItemProcessor<Email, Email> helloProcessor() {
return email -> {
log.info("Processing email: {} -> {}", email.getId(), email.getToEmail());
return email;
};
}
/**
* Writer: 로그만 출력
*/
@Bean
public ItemWriter<Email> helloWriter() {
return items -> {
log.info("Writing {} emails", items.size());
for (Email email : items) {
log.info(" - {}: {}", email.getId(), email.getSubject());
}
};
}
}
|
3단계: 배치 실행 Controller
개발 환경에서 테스트하기 위한 간단한 Controller입니다.
1
2
3
4
5
6
7
8
9
10
11
12
13
14
15
16
17
18
19
20
21
22
23
24
25
26
27
28
29
30
31
32
33
34
35
36
37
38
39
| package com.example.batch.controller;
import lombok.RequiredArgsConstructor;
import lombok.extern.slf4j.Slf4j;
import org.springframework.batch.core.Job;
import org.springframework.batch.core.JobParameters;
import org.springframework.batch.core.JobParametersBuilder;
import org.springframework.batch.core.launch.JobLauncher;
import org.springframework.web.bind.annotation.PostMapping;
import org.springframework.web.bind.annotation.RequestMapping;
import org.springframework.web.bind.annotation.RestController;
@Slf4j
@RestController
@RequestMapping("/api/batch")
@RequiredArgsConstructor
public class BatchController {
private final JobLauncher jobLauncher;
private final Job helloJob;
@PostMapping("/hello")
public String runHelloBatch() {
try {
// Job Parameter에 timestamp를 넣어서 매번 새로운 Job으로 인식
JobParameters jobParameters = new JobParametersBuilder()
.addLong("timestamp", System.currentTimeMillis())
.toJobParameters();
jobLauncher.run(helloJob, jobParameters);
return "Hello Batch 실행 완료!";
} catch (Exception e) {
log.error("Batch execution failed", e);
return "배치 실행 실패: " + e.getMessage();
}
}
}
|
4단계: 실행 및 확인
1. 애플리케이션 시작
2. 배치 실행
1
| curl -X POST http://localhost:8080/api/batch/hello
|
3. 로그 확인
1
2
3
4
5
6
7
8
9
10
| 2026-01-22 15:30:00.123 INFO --- Job: [SimpleJob: [name=helloJob]] launched
2026-01-22 15:30:00.234 INFO --- Executing step: [helloStep]
2026-01-22 15:30:00.345 INFO --- Processing email: 1 -> user1@example.com
2026-01-22 15:30:00.346 INFO --- Processing email: 2 -> user2@example.com
2026-01-22 15:30:00.347 INFO --- Processing email: 3 -> user3@example.com
2026-01-22 15:30:00.456 INFO --- Writing 3 emails
2026-01-22 15:30:00.457 INFO --- - 1: Welcome!
2026-01-22 15:30:00.458 INFO --- - 2: Newsletter
2026-01-22 15:30:00.459 INFO --- - 3: Promotion
2026-01-22 15:30:00.567 INFO --- Job: [SimpleJob: [name=helloJob]] completed with status: [COMPLETED]
|
4. 메타데이터 확인
1
2
3
4
5
| -- Job 실행 이력
SELECT * FROM batch_job_execution ORDER BY job_execution_id DESC LIMIT 1;
-- Step 실행 상세
SELECT * FROM batch_step_execution ORDER BY step_execution_id DESC LIMIT 1;
|
처리 흐름 시각화
Hello Batch 전체 흐름
flowchart TB
    subgraph Job["Job: helloJob"]
        subgraph Step["Step: helloStep"]
            subgraph Chunk["Chunk 1 (10건)"]
                Reader["1. Reader<br/>SELECT * FROM email_send_queue<br/>WHERE status = 'PENDING'<br/>LIMIT 10"]
                Processor["2. Processor<br/>log.info('Processing email')"]
                Writer["3. Writer<br/>log.info('Writing emails')"]
                Commit["4. COMMIT"]
                Reader --> Processor --> Writer --> Commit
            end
        end
        Status["Status: COMPLETED"]
    end
핵심 개념 정리
Job vs Step vs Chunk
1
2
3
4
5
6
7
8
9
10
11
12
| Job (배치 작업)
│
├─ Step 1
│ ├─ Chunk 1 (1~10건) → Reader → Processor → Writer → COMMIT
│ ├─ Chunk 2 (11~20건) → Reader → Processor → Writer → COMMIT
│ └─ Chunk 3 (21~30건) → Reader → Processor → Writer → COMMIT
│
├─ Step 2
│ └─ Chunk 1 (1~10건) → Reader → Processor → Writer → COMMIT
│
└─ Step 3
└─ ...
|
Reader → Processor → Writer 흐름
| 컴포넌트 | 처리 단위 | 역할 |
|---|
| Reader | 1건씩 읽기 | DB에서 데이터 조회 |
| Processor | 1건씩 처리 | 비즈니스 로직 수행 |
| Writer | Chunk씩 쓰기 | DB에 결과 저장 |
Reader/Processor는 1건씩, Writer는 Chunk 단위로 처리한다는 점이 핵심입니다.
다음 편 예고
2편에서는 실제 이메일 발송 배치를 구현합니다.
다룰 내용은 다음과 같습니다.
- 실제 이메일 발송 로직 구현
- 발송 성공/실패 처리
- 발송 결과 DB 업데이트
- Chunk 크기 최적화
- 에러 처리 (Skip, Retry)
- 트랜잭션 관리
미리보기 코드
1
2
3
4
5
6
7
8
9
10
11
12
13
14
15
16
17
18
19
20
21
22
23
24
| // 2편에서 만들 실제 Processor
@Bean
public ItemProcessor<Email, Email> emailProcessor() {
return email -> {
try {
// 실제 이메일 발송
boolean success = emailService.send(
email.getToEmail(),
email.getSubject(),
email.getContent()
);
email.setStatus(success ? "SUCCESS" : "FAILED");
email.setSentAt(LocalDateTime.now());
return email;
} catch (Exception e) {
email.setStatus("FAILED");
email.setErrorMessage(e.getMessage());
throw e; // Skip 또는 Retry
}
};
}
|
핵심 요약
Spring Batch를 사용하는 이유
| 이점 | 설명 |
|---|
| 대용량 처리 | 메모리 효율적인 Chunk 단위 처리 |
| 트랜잭션 관리 | Chunk 단위 커밋으로 안정성 확보 |
| 재시작 지원 | 실패 지점부터 재개 가능 |
| 모니터링 | 메타데이터 자동 기록 |
Gradle 의존성
1
2
3
| implementation 'org.springframework.boot:spring-boot-starter-batch'
implementation 'org.springframework.boot:spring-boot-starter-data-jpa'
runtimeOnly 'org.postgresql:postgresql'
|
기본 Configuration
1
2
3
4
5
6
7
8
9
10
11
12
13
14
15
16
| @Bean
public Job myJob() {
return new JobBuilder("myJob", jobRepository)
.start(myStep())
.build();
}
@Bean
public Step myStep() {
return new StepBuilder("myStep", jobRepository)
.<Input, Output>chunk(1000, transactionManager)
.reader(reader())
.processor(processor())
.writer(writer())
.build();
}
|
참고 자료
마치며
1편에서는 Spring Batch의 기본 개념과 Hello World 배치를 만들어봤습니다.
다음 편에서는 실제 이메일 발송 로직 구현, 성공/실패 처리, 에러 핸들링, 트랜잭션 관리를 다루겠습니다.
초기 설계가 탄탄해야 서비스도 견고해지고 높게 지을 수 있다고 생각하기 때문에 배치 처리의 기본기를 꼭 다지고 가시길 바랍니다.